Insert One or multiple rows in Excel
In this tutorial, I will show you how to add one or multiple rows in Excel. With demos, you can also see the shortcut for adding rows.
While working in Excel, you will require adding one or more rows in between the existing rows that contain text or other information.
In this tutorial, I will show you how to add one or multiple rows in Excel. With demos, you can also see the shortcut for adding rows.
An example of adding a row by shortcut
The shortcut for adding a new row is:
Ctrl Shift +
That is, press these keys together for adding a new row.
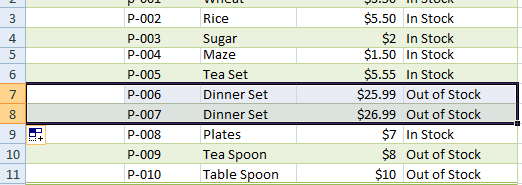
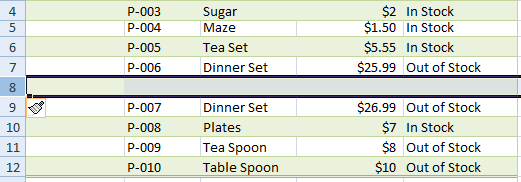
For showing how adding one or more row works, I have a worksheet that contains a few rows of data. The target is to add a new row between row number 7 and 8 as shown below:
For adding a single row by shortcut, select the row number 8 and press Ctrl Shift +. This should add a new blank row which number should be 8.
Rather than selecting the whole row, you may also select a single cell e.g. B8, C8, etc.
Adding a row by right click example
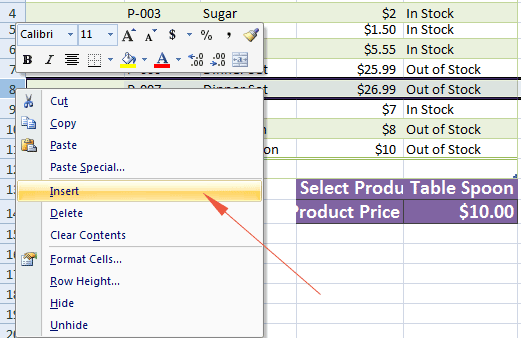
For adding a new blank row between 7 and 8, right-click on the number 8 or any cell of the row number 8 and click the “Insert” option.
This should add a new row with number 8 while that row becomes number 9.
Note that, if you right click on row number 7 and press the Insert option, it will add a new row between 6 and 7.
The example of adding multiple rows by shortcut
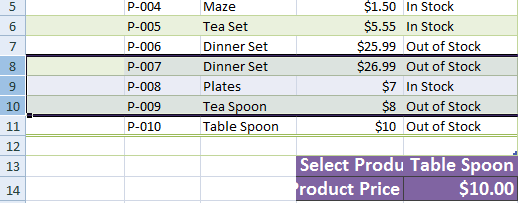
Suppose, we want to add three new rows between the existing row number 7 and 8. For that, simply select three rows i.e. 8, 9, and 10. You may also select only a few cells of these rows:
Now press the same shortcut key as for single row:
Ctrl Shift +
This should add three new rows as shown below:
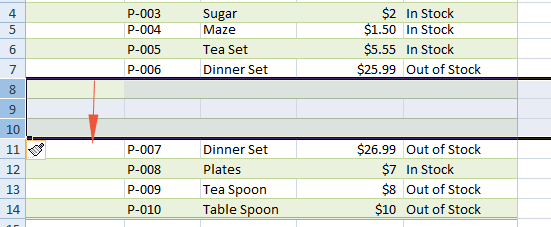
You can see, three new rows are added between 7 and 8 rows.
Suppose we want to add three new rows between existing 7 and 8 number rows. Follow these steps for adding by right click.
Step 1:
Select row number 8, 9 and 10.
Step 2:
Right click on the 8, 9 or 10 number or any of their cells.
Step 3:
In the right click menu, click on the “Insert” option. This should add three new rows.
The main menu also has the option for adding new rows and columns etc. For adding a new row(s), follow this.
Step 1:
Select one or more rows depending on the number of new required rows plus its placement. In the above example, the placement was between the 7 & 8 rows while we added three rows.
Step 2:
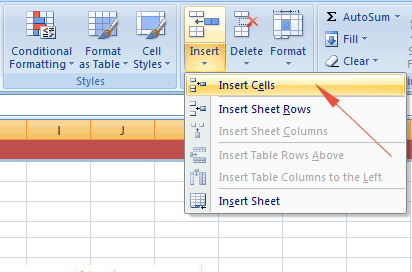
Go to the Home tab in the ribbon.
Step 3:
Locate the “Cells” group and the “Insert” button, click on the “Insert Cells” option as shown below.
This should add one more rows (depending on the selection) to the desired position.