2 Examples to Set Border of Excel Cell by R xlsx package
The border color of Excel sheet cells, rows etc. can be set by using the Border function of R xlsx package.
How to set Border Color by R xlsx package
The border color of Excel sheet cells, rows, etc. can be set by using the Border function of R xlsx package.
The Border function has parameters for color and position where you may specify the color that you want to apply in a cell.
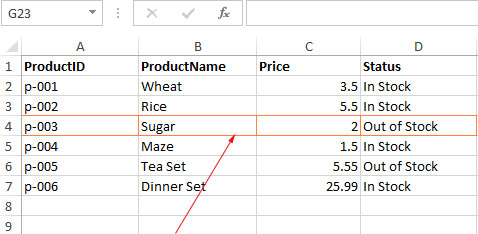
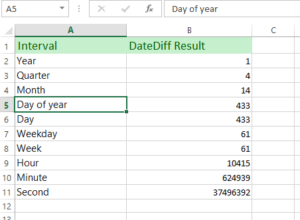
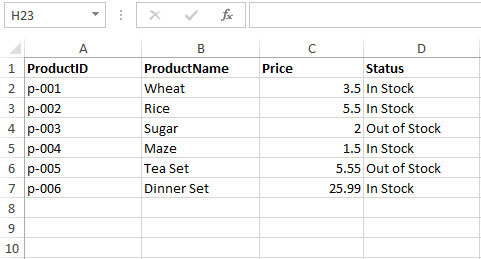
See the example below but before that have a look at our sample sheet where we will apply the border colors.
Step by Step of applying the border color to Excel cell
Step 1:
Include the xlsx package:
library(xlsx)
If you have not already installed it, execute this command in the R console to install the required xlsx library:
install.packages("xlsx")
Just to remind you, it requires JDK 1.5 or above. Read more about the requirements here.
Step 2:
Loading Excel file (Workbook) and specify the sheet:
wb_border <- loadWorkbook(file="products4.xlsx")

AllSheets <- getSheets(wb_border)

sheet <- AllSheets[[1]]
Step 3:
Which cell to apply the border color? Suppose we want to apply border color to the B6 cell:
row <- getRows(sheet, 6)

cells <- getCells(row, 2)

cell <- cells[[1]]
Step 4:
Create the new border style. There you will provide the color name or Hexa code by using the Border function:
border_style <- CellStyle(wb) +

           Border(color    = "green",

                  position = c("TOP","LEFT","RIGHT",

                               "BOTTOM"

                              ))
Step 5:
Apply the color to the specified cell:
setCellStyle(cell, border_style)
Step 6:
Save the Workbook:
saveWorkbook(wb_border, "products4.xlsx")
The above example with output
Now let us combine all of the above code and execute this to see how our sample sheet looks after applying this border style.
R code:
library(xlsx)
# Specify Workbook and sheet

wb <- loadWorkbook(file="products.xlsx")
SheetList <- getSheets(wb)
sheet <- SheetList[[1]]

# Specify the cell
row <- getRows(sheet, 6)
cells <- getCells(row, 2)
cell <- cells[[1]]

# Creating style for border
border_style <- CellStyle(wb) +

           Border(color    = "red",

                  position = c("LEFT",

                               "TOP",

                               "RIGHT",

                               "BOTTOM"

                              ))

# apply border style
setCellStyle(cell, border_style)

saveWorkbook(wb, "products.xlsx")
Resultant sheet:
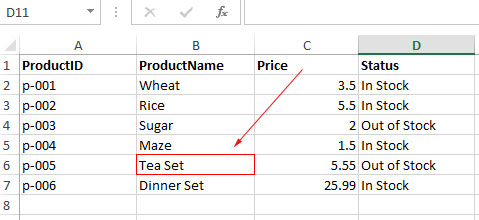
You can see, the B6 cell’s border is red in all directions.
Note: If you do not provide the position values (LEFT, TOP, RIGHT, and BOTTOM), only the Bottom border color is applied.
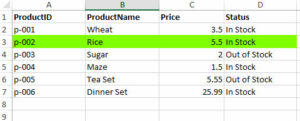
Applying border style to a row example
In this example, we will apply a new border to a complete row. Our sample sheet contains seven rows of data including the header row.
We will get the fourth row and apply a new border style with orange color.
R code:
library(xlsx)
# load the workbook and get the sheet
wb_border <- loadWorkbook(file="products.xlsx")

AllSheets <- getSheets(wb_border)

sheet <- AllSheets[[1]]


row <- getRows(sheet, 4)
cel <- getCells(row)

# Creating style for border
border_style <- CellStyle(wb_border) +

           Border(color    = "#FF8040",

                  position = c("TOP",

                           "LEFT",

                           "RIGHT",

                           "BOTTOM"
                   ))


#Applying color to the row
for (i in names(cel)) {
  setCellStyle(cel[[i]], border_style)
}

saveWorkbook(wb_border, "products.xlsx")
Result sheet: