Moving Columns and Rows in Excel
In simple terms, moving the rows and columns in Excel is just the matter of copy and paste or pressing the short keys Ctrl + X and Ctrl + P, that you might already used too while working in Excel, MS Word or other programs.
In simple terms, moving the rows and columns in Excel is just a matter of cut and paste or pressing the short keys Ctrl + X and Ctrl + V, which you might already use while working in Excel, MS Word, or other programs.
However, you may move columns and rows in other ways as well.
In this tutorial, I will show you how to move columns and rows in Excel by copy/paste and another way with pictures – so keep reading.
Moving column by mouse drag
Follow these steps for moving a column to the desired location by using the mouse.
Select a column by clicking on A, B, C, etc.
Bring to mouse over the border of any cell in the selected column so that the mouse pointer becomes a "move pointer":
![]()
The picture below shows the border with a move pointer:
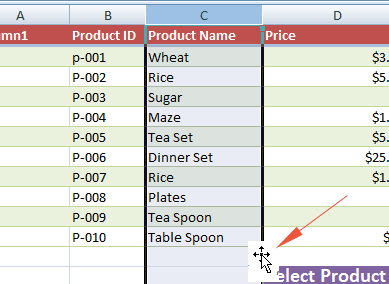
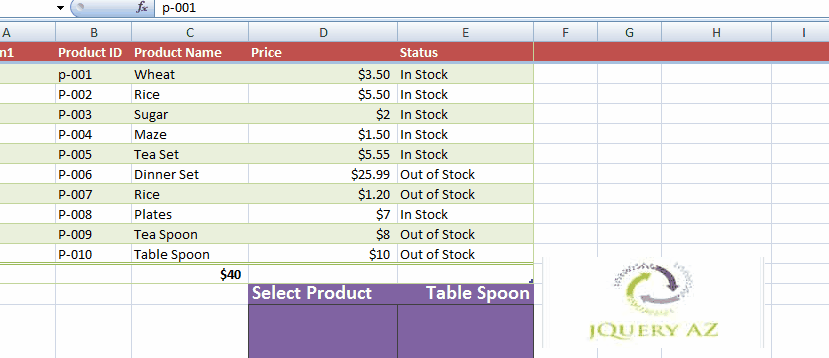
Drag the move pointer to the desired location where you want to relocate the column. For example, we want to move the column C to the H:
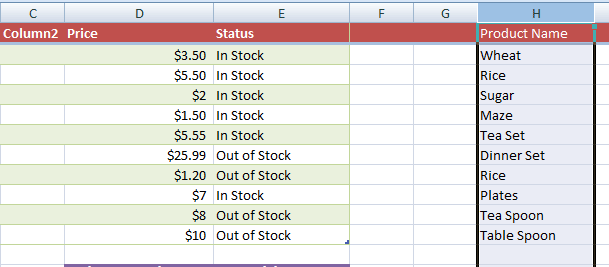
You can see the C column is moved to the H.
Moving column by short keys
For moving a column by short key, follow this:
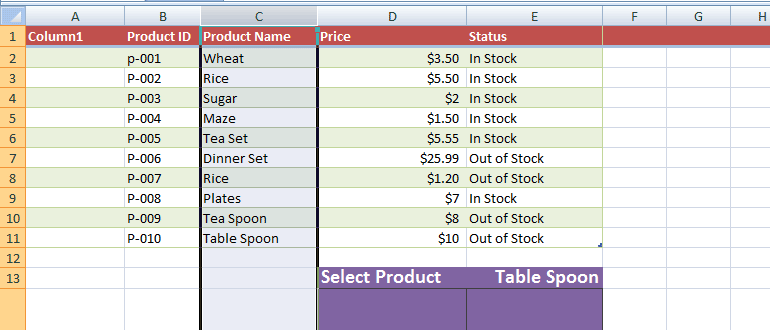
Select the column as we did in the above example. For example, we selected C in our demo.
Press the Ctrl + X on Windows or Command + X on Mac operating system.
Select the desired destination column letter that will highlight the whole column. In our demo, we selected H.
Now press Ctrl + V on Windows OS or Command + V on Mac.
Using Mouse Right Click
Select a column header as we did in both above methods. I selected C column again that I will move to column H.
From the keyboard, press Ctrl + X on Windows or Command + X on Mac OS. This should make the borders of C column dotted.
Select column H header so that whole column is selected and press Ctrl + V (Windows) or Command + V on Mac.
This will move the contents of column C to column H.
If you want to copy the content rather than cut/paste then instead of Ctrl + X in step 2, press Ctrl + C or Command + C short keys.
A word of caution before moving ahead
As moving columns, Excel copies the content as well as any formulas, resulting in moving the values, hidden cells, and cell formats.
However, cell references are not adjusted. You need to adjust the column references manually.
For example, as we moved C column contents to H and if other cells like D column cells are referencing the C cells then those will keep on referencing C after you copied the content to H.
That may result in #REF! error – so be careful.
Moving rows example
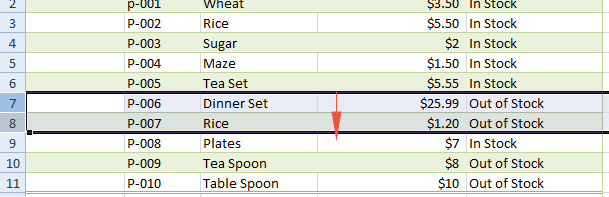
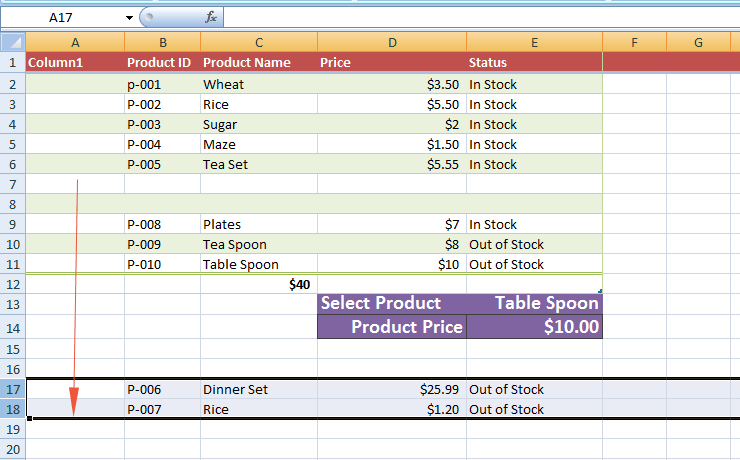
For moving one or more rows, the procedure is almost the same as in the case of columns. Follow these steps for moving one or more rows to a new location. We will move row number 7 and 8 to the 17 and 18.
Select a row by clicking on the number towards the left side. If you want to select more than one row then keep on selecting the rows by first pressing on a number and then move up or down as mouse is pressed.
You may also use the Shift key after selecting the first row with mouse and then press the Shift + Down or Up arrow.
For example, I selected 7 and 8 as shown below:
Bring the mouse over the black thick border so that the "move" pointer displays.
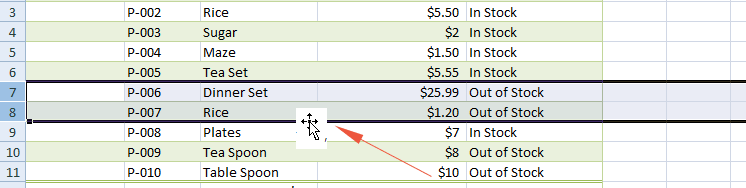
Drag the mouse down and leave it in row 17 (for our demo). You will leave it to the destination row as required.
Using short keys for moving rows
You may also use keyboard shortcut keys for moving the rows.
Select the rows that you want to move as in the above case. I selected 7 and 8 row.
Press Ctrl + X (Windows) or Command + X (Mac users).
Go to the first cell of the 17 row i.e. A17 (for our demo) and press Ctrl + V or Command + V.
That’s it!