Add/Remove Columns in Excel
In this tutorial, you will learn how to add a column in between other existing columns.Two ways of adding the column in for that scenario are explained below.
- In this tutorial, you will learn how to add a column in between other existing columns.
- For example, you have entered data in columns A, B, C, D, and E.
- Now you need another column in the worksheet that is between C and D. So, the existing column D becomes E while a new column D is added with empty values.
- Two ways of adding the column for that scenario are explained below.
- The tutorial also covers how to remove columns.
First way – Add a column by right click
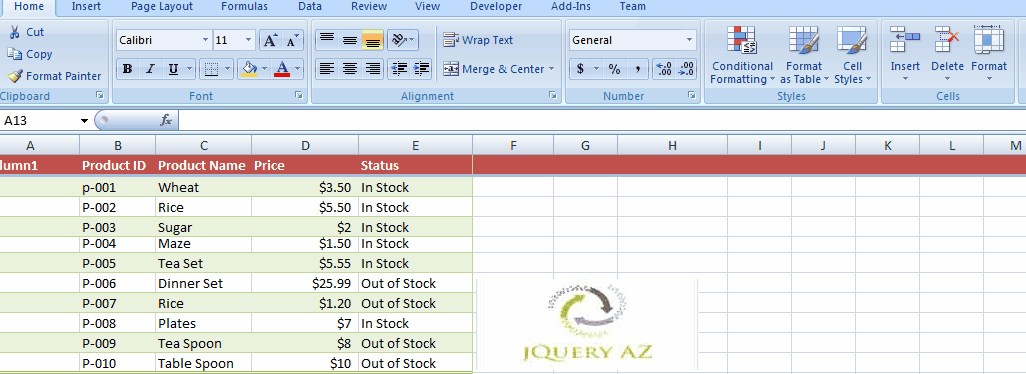
Suppose we have five existing columns as shown below:
We want to add a new column between C and D. This is how you can do this easily.
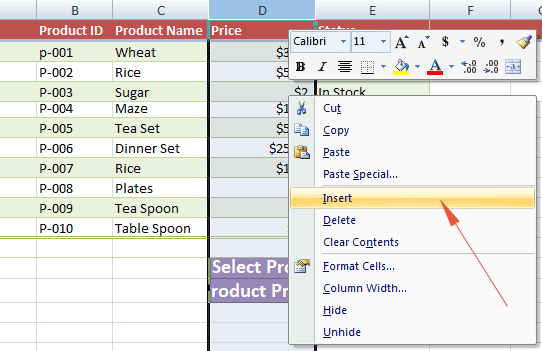
Select the existing column D and right-click on this. You may also right-click on any cell of column D after selecting the column.
In the popup menu, click on the “Insert” option as shown below:
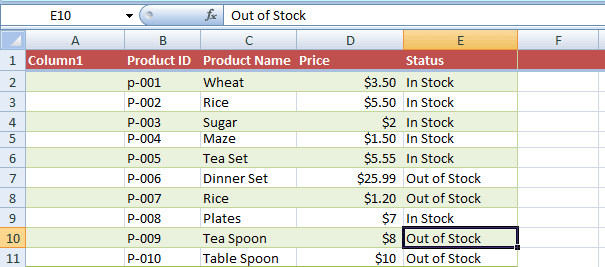
After you click the Insert, a new column should be added with the letter D head:
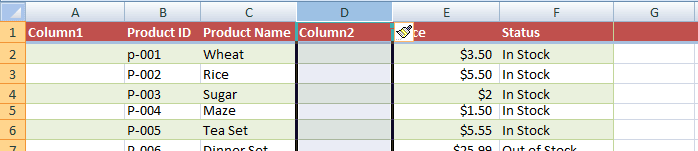
You can see, the new column is D with empty values. The previous column D became E, and E became F.
Second Way of adding the column – In the Ribbon
This method applies to the following MS Excel versions:
To add a column in these versions of Excel, follow this:
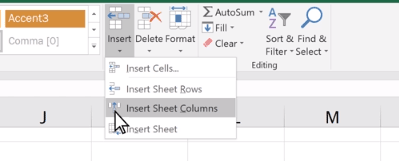
Select the column as we selected D in the above example.
Select Home > Insert > Insert Sheet Columns
That’s it.
The example of removing a column
Just like adding a new column is simple in Excel, removing an existing column is a matter of two clicks. To remove a column, follow these steps.
Suppose we want to remove the existing “Price” column (D) for the demo.
Select the column D and right-click any of its cells.
Click on the “Remove” option in the right-click menu.
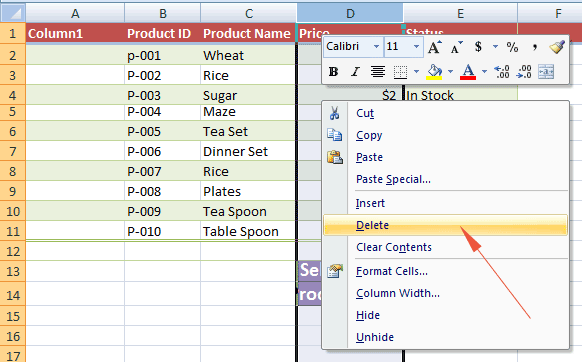
Column D should be removed.
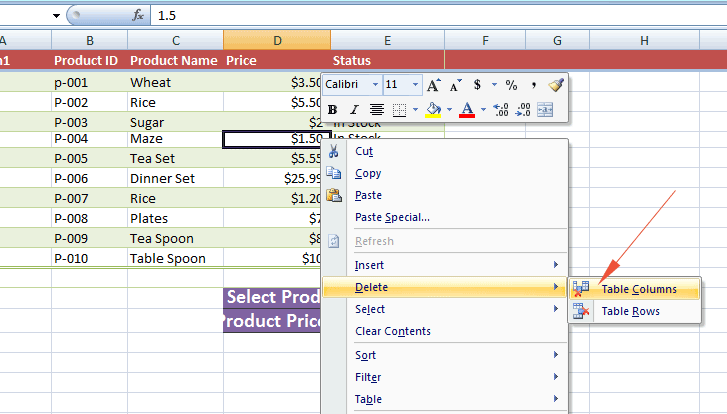
Click on the “Table Columns” and the D column should be removed.
Just like adding a new column for Excel version 2007 and above, you may use the main menu to remove a column as follows:
- Go to “Home” in the ribbon
- Under the “Cells” group, open the “Delete” menu
- Click on the “Delete Sheet Columns”
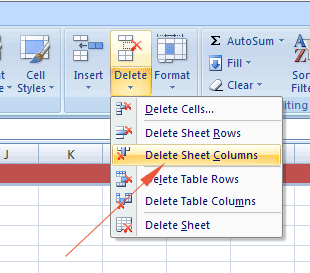
The selected column should have been removed.